To totally unlock this section you need to Log-in
Login
For a long time Windows has an option to select a file in Explorer and email it. Right-click on a file, choose "Send to" then one from the list of options. The exact list depends on what you have installed on your computer.
With Outlook 2003, 2007, 2010, 2013, when you right click on a file and choose Send To - Mail Recipient, it will launch a Outlook in "New mail" mode, letting us to send the email with the file already attached to it.
Sometimes this behaviour could be "broken". This trick will help you re-create a shortcut to launch Outlook email editor.
Procedure
In Windows XP go to "C:\Documents and Settings\%username%\SendTo", while on Windows Vista/7/8 we'll have to go in "%UserProfile%\AppData\Roaming\Microsoft\Windows\SendTo":
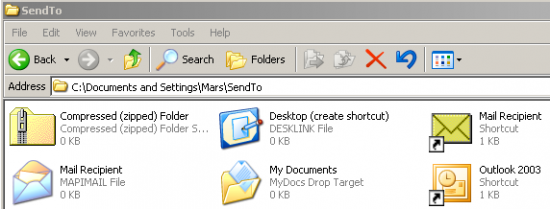
Change option "Send To - Mail Recipient" option - the SendTo folder in Windows.
- Right-click and create shortcut with Target as the following (on 32-bit systems):
""C:\Program Files\Microsoft Office\OFFICE11\OUTLOOK.EXE" /c IPM.MAil /a" (Office 2003)
""C:\Program Files\Microsoft Office\OFFICE12\OUTLOOK.EXE" /c IPM.MAil /a" (Office 2007)
""C:\Program Files\Microsoft Office\OFFICE14\OUTLOOK.EXE" /c IPM.MAil /a" (Office 2010)
""C:\Program Files\Microsoft Office\OFFICE15\OUTLOOK.EXE" /c IPM.MAil /a" (Office 2013)
On 64-bit systems the path will resemble the following string:
""C:\Program Files (x86)\Microsoft Office\OFFICE12\OUTLOOK.EXE" /c IPM.MAil /a" (Office 2007)
""C:\Program Files (x86)\Microsoft Office\OFFICE14\OUTLOOK.EXE" /c IPM.MAil /a" (Office 2010)
""C:\Program Files (x86)\Microsoft Office\OFFICE15\OUTLOOK.EXE" /c IPM.MAil /a" (Office 2013)
The new right click menu will now launch Outlook email editor with the file selected correctly attached to the new e-mail.
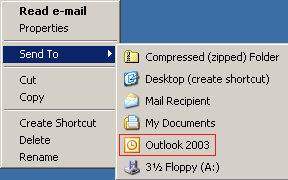
Change option "Send To - Mail Recipient" option - access to the new SendTo item for Outlook new mail feature.
An alternative shortcut's Target
In that folder create a new Shortcut item (File | New | Shortcut or use the right-click menu) and you may see a wizard:
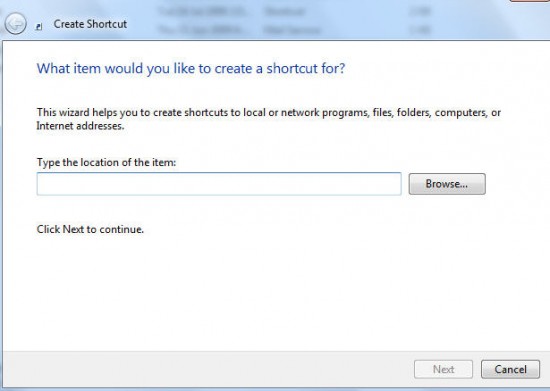
Change option "Send To - Mail Recipient" option
Location of item in this case means the location and name of the email program, Outlook.exe.
Where Outlook.exe is on your computer depends on the version of Windows or Office as well as the setup details so we can only give general guidance.
It should be below the "\Program Files\Microsoft Office" folder in a folder named for the Microsoft internal version of Office.
For example Office 2010 is usually in “C:\Program Files\Microsoft Office\Office14”. Office 2007 uses "Office12" and so on back into the past.
If you have 32-bit Office 2010 running on 64-bit Windows then it will be "\Program Files (x86)\Microsoft Office\Office14".
Use the Browse dialog to select Outlook.exe then it will appear in the "Location of item" wizard like this:
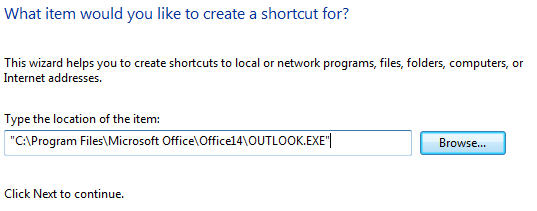
Notice that the entire path and file name is in double-quotes: that is important.
Next add some command switches so Outlook knows what to do. The command switches are outside the double-quotes:
For Outlook 2007, Outlook 2010 and Outlook 2013: a space then /c ipm.note /a
For Outlook 2003 and before: a space then /c ipm.note

Now you can click the Next button for the final step.
The name for the shortcut will appear in the right-mouse menu. Give it any name you like.
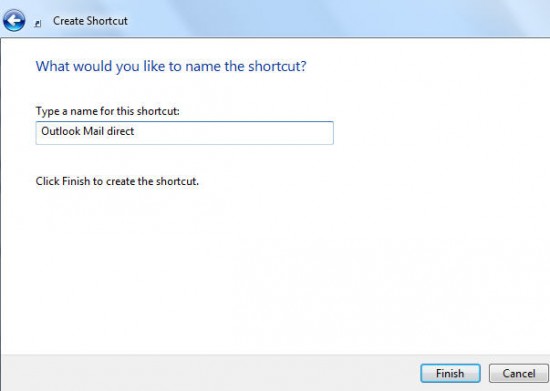
If you’d like the item to appear at the top of the menu list, use the old underscore trick like: “_Outlook Mail direct”.
Now test the new shortcut. If it doesn’t work check the settings carefully. Right-click on the shortcut in the \SendTo folder and choose Properties | Shortcut:
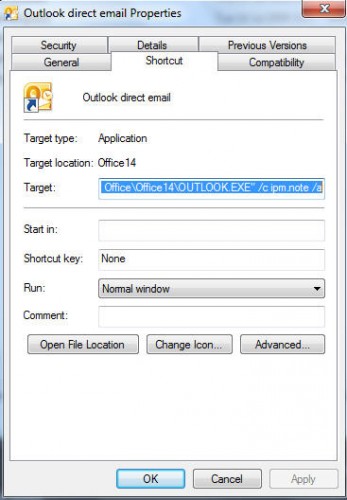
Check the Target line for the file path and switches.
Now you can choose a file and it’ll be attached to a blank outgoing email. Type in the recipients, subject and text of your choice. In all respects it’s a plain Outlook that you can send, save as a draft or cancel like any other message.
The shortcut only works for single files. If you select multiple files then use this shortcut you'll get an error message. The workaround is to create the email then drag and drop files into the email window to add them as attachments.
NOTE: both the IPA.Mail and IPM.Note method can only attach one file to a New Mail in Outlook.
EXTRA: if you want to shorten the Send To menu, simply edit the \Send To folder mentioned above. I mean, how many of us send a file via Bluetooth or a fax recipient? Delete the unwanted shortcuts. More cautiously, move the shortcut extension to a another place (a folder called 'Old Send to links') so you can move it back if necessary.
Quick access to SendTo folder
Windows "Send To" menu can be a great time saver when working with files, but it doesn't work quite the same way in Windows 8 as it did in Windows 7. The experts at SuperUser show us how to customize the entries in that list.
If you want to add your own app or folder to the Send to menu, it's very simple: Just open the Run dialog box by pressing Win+R, then paste this command into the text box:
shell:sendto
Restore missing Mail Recipient entry to the Send To menu
A copy of the file is present in each user profile, and also in the Default user profile. Follow one of the methods below to restore the file and the Mail Recipient entry to the Send To menu.
Method 1
Click Start, type the following and press Enter:
C:\Users\Default\AppData\Roaming\Microsoft\Windows\SendTo
Right-click the Mail Recipient icon and choose Copy (Keyboard: CTRL+C), then click Start, type the following and press Enter:
shell:sendto
Right-click an empty area in the folder, and choose Paste (CTRL+V).
Method 2
Click Start, type control folders and press ENTER. Select the View tab, and uncheck the following option: Hide extensions for known file types.
Click OK. Click Start, type shell:sendto and press ENTER.
Create a new text document (Right-click - New - Text document) and rename the text file to Mail Recipient.MAPIMail.
Click Yes when you see the following message:
If you change a file name extension, the file may become unusable.


Are you sure you want to change it?
Note that after renaming the file, the .MAPIMail extension hides automatically. The Mail Recipient entry should now be restored to the Send To menu.
 |  |