To totally unlock this section you need to Log-in
Login
DNS, or Domain Name System, is a server that translates domain names like apple.com to IP addresses, a numerical sequence of numbers that can locate servers on the internet. Your ISP has its own DNS server that is used by default on all your iOS devices, but you can also point it to a different DNS server.
Why would you want to change the default DNS server? Most ISPs’ DNS servers aren’t fast enough, and because DNS lookups are performed very often, this could greatly impact your browsing experience. Many ISPs also redirect you to unwanted sites on some occasions for commercial benefit. If you’ve ever experienced a situation where a site opens up on other connections, but not on your connections, changing the DNS could fix the issue.
So here’s how you change your DNS settings:
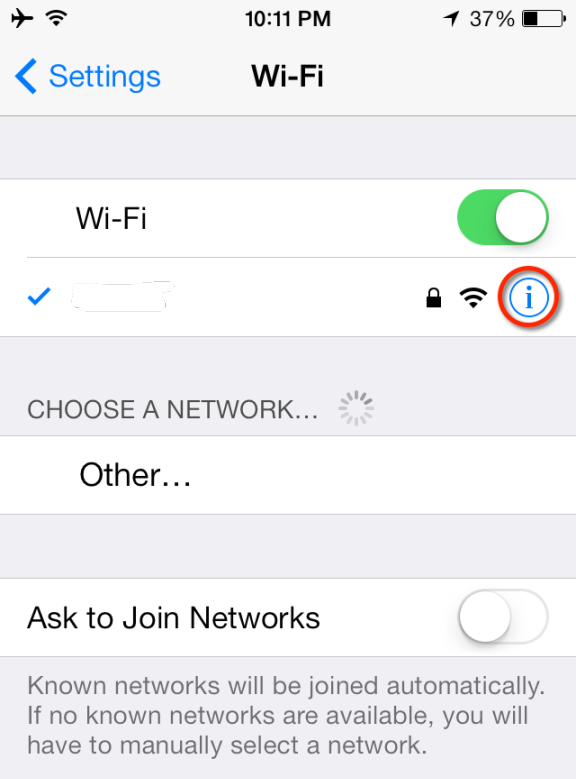
Open the Settings app on your device, and tap on the Wi-Fi menu. Find out your Wi-Fi connection from the list of available networks, and tap on the "i" button on the right.
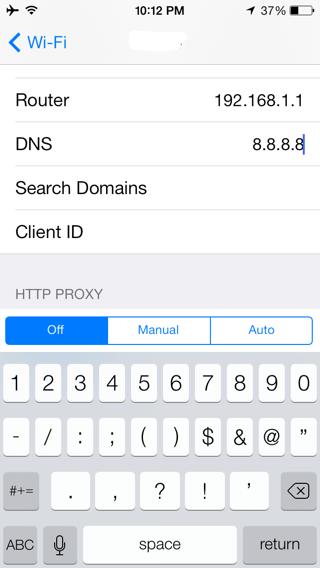
Scroll down until you see the DNS section, and tap on the numbers to the right.
A keyboard should appear, and you can now enter the new DNS server address. Tap on Wi-Fi to go back, once you’re done.
What DNS server to use
Of course, you’ll want to know which DNS server you want to use, so here are the options:
Google DNS: Google operates a free DNS service that promises speed, performance and security. To use Google’s DNS, use any of these addresses in the DNS field:
8.8.8.8


8.8.4.4
OpenDNS: Open DNS is another free DNS service that promises speed, reliability, and security. You can enter either of these addresses to use OpenDNS:
208.67.222.222


208.67.222.220


