If you are setting up a new web server or another device that's going to be connected to the internet and you want to put it through its paces before it's live, or if you're having trouble with spyware and adware networks, there's an invisible file on your Mac that can help. It's called the hosts file, and this is how to use it.
The Domain Name System
When you type in the domain name of a web site you want to visit there's a lot happening behind the scenes.
Every web site, every service, almost every device connected to the Internet has a unique numeric address that tells all the other devices where it is - its TCP/IP address. The Domain Name System (DNS) translates those numeric addresses into something a bit more recognizable and memorable to humans, like, "www.example.com" for example.
The Hosts file
The Domain Name System and its associated cache is your Mac's standard way of knowing how to get to where it's going on the Internet, but there's another file that can be very useful. It's called the Hosts file, and it can be used to override the default DNS cached information and following requests.
There are some practical reasons for why you'd want to use the Hosts file instead of just letting DNS do its thing. Let's say you're testing a development server you're about to deploy, and you'd like to use its domain name instead of the machine's specific IP address. Before the system's online and accessible to anyone using DNS, you can use the hosts file instead: enter the machine's IP address and when you use that domain name, your Mac will go to that device instead.
You can also use the hosts file to block or work around spyware and ad networks by "zeroing out" their IP addresses - putting in 0.0.0.0 then the name of the domain you'd like to block.
Basically, the hosts file do the same operation we would see on Windows and Linux modifying the same file on those systems.
How to edit the Hosts file
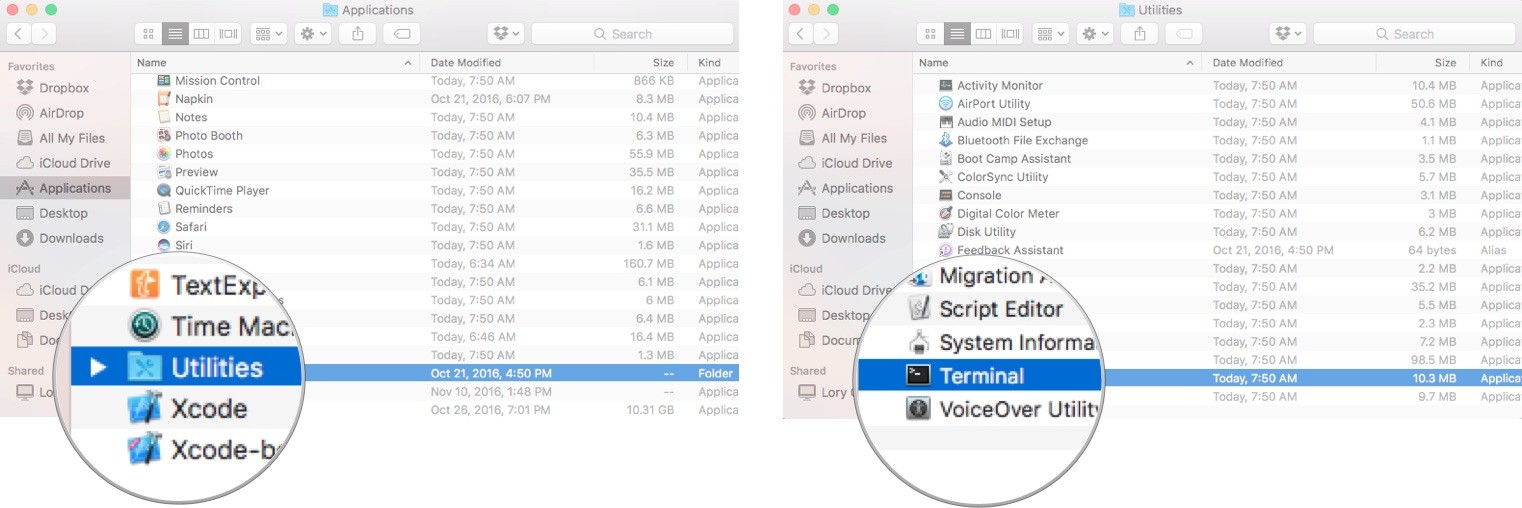
You'll need to know the IP address of the device you'd like to send your Mac to, or the domain names you're trying to keep your Mac away from. The best way to work with the Hosts file is using the Terminal application found in your Mac's Utilities folder. You can search for Terminal using Spotlight or by selecting it in Finder.
- Open a Finder window.
- Select Applications from the sidebar.
Now double-click on Utilities and then double-click on Terminal.
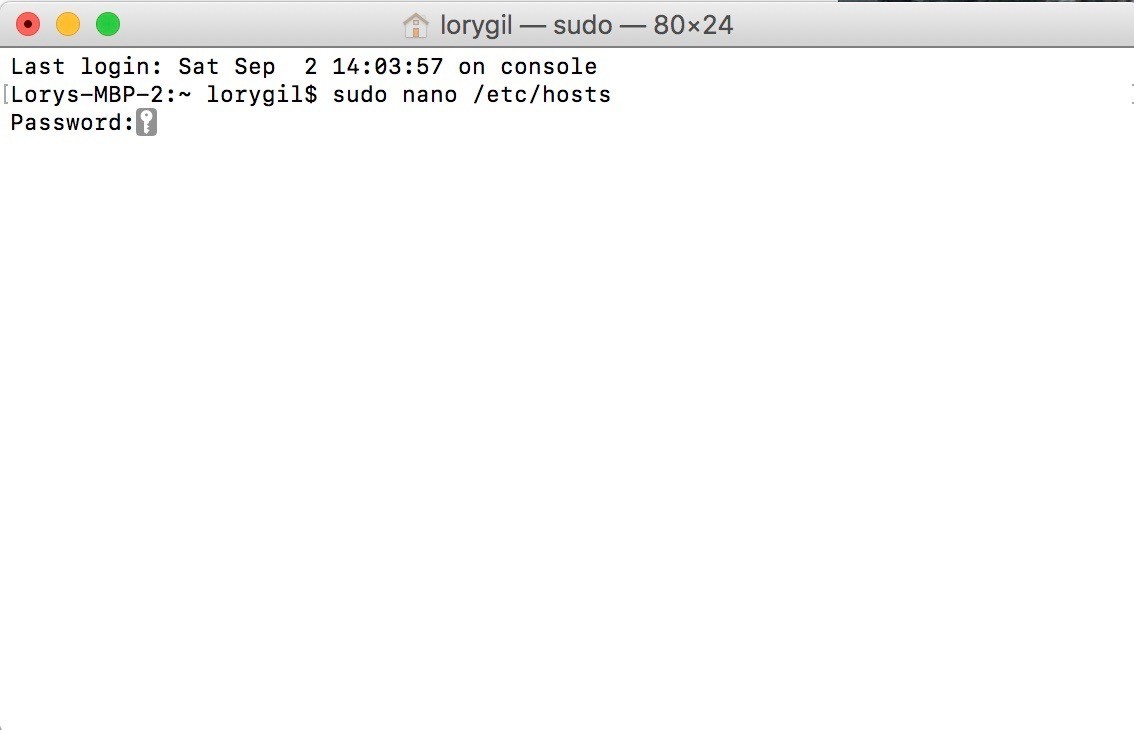
In the Terminal window, you will need to enter a command to open the Nano text editor. You will need your administrator password, as well. Type the following command and then hit Return key:
sudo nano /etc/hosts
Enter your administrator password and then hit Return.
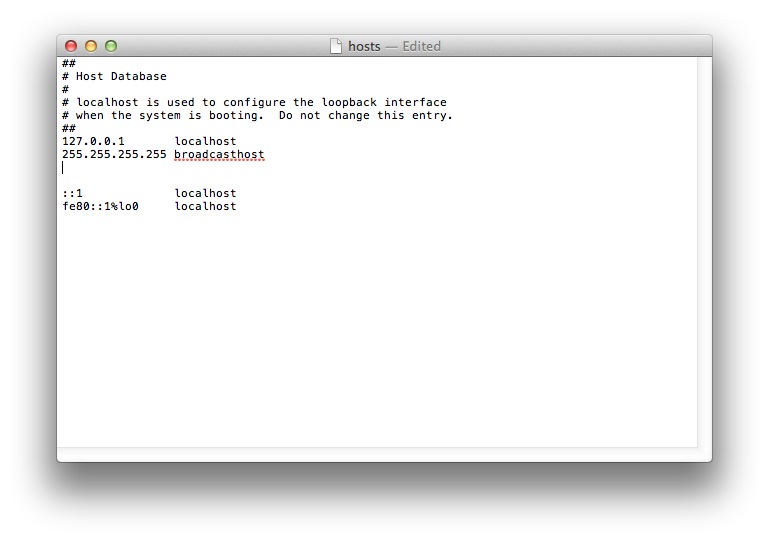
If you go to /etc/hosts and open it using Finder, simply double-clicking on it, it will display the file’s contents in TextEdit (or the text editor of your choice).
By default, the hosts file is relatively simple. It contains a number of lines of descriptive text which are “commented out” with the pound or number sign (#). For each line, any text after the pound sign is ignored by the computer, making it a good way to add notes and descriptions to your files.
It also contains default IP values for localhost and broadcasthost. To edit the file, you will add your own lines after broadcasthost.
If you want to add a new device or domain, move the cursor using the arrow keys and position it after the text in the window. Then, begin typing.
If you're mapping a particular IP address on your local network to a domain, you can type the IP address, hit tab, then type the domain name.
Conversely, if you'd like to make sure a web URL doesn't go to its intended site: if you're trying to keep your Mac away from certain sites, use "127.0.0.1."
That'll map it back to your Mac (localhost). Even if your Mac is assigned a different IP address by its router, 127.0.0.1 defaults to the local machine thanks to the default settings in that hose file.
Once you're done, hold down the control and O keys to save the file, then control and X to exit.
You can add as many entries to the hosts file as you wish by entering new mappings on each line. Once you’ve made your desired changes to the hosts file, save it in its current location on the Desktop. Then, drag and drop, if using Finder , the hosts file from your Desktop back to its original location at /etc.
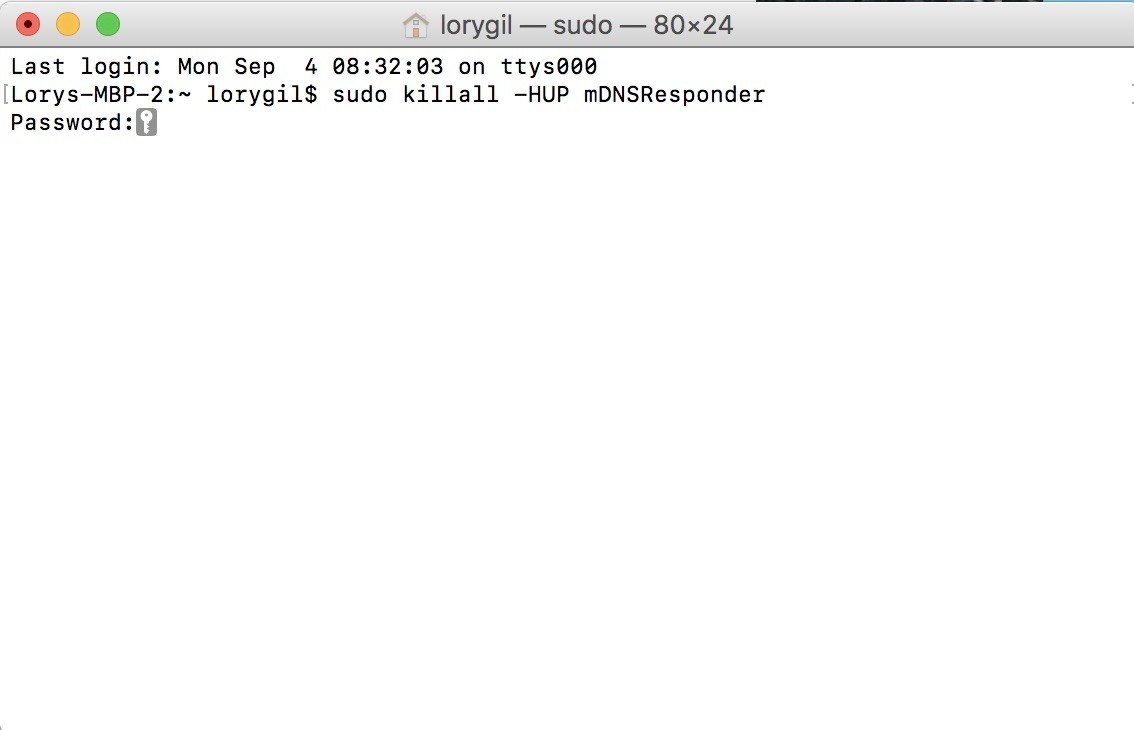
With the modified hosts file now in place, fire up your Web browser to test the changes. In most cases, the new mapping should work immediately, but if you’re not seeing the correct behavior, you may need to flush your DNS cache. For OS X Lion and OS X Mountain Lion, open Terminal and use the following command. Note that you will need to enter your admin password to execute it:
sudo killall -HUP mDNSResponder
For OS X Mavericks, use this command instead:
dscacheutil -flushcache; sudo killall -HUP mDNSResponder


