To totally unlock this section you need to Log-in
Login
Sometimes you will connect a USB to the PC and get an error message saying the drive has a GPT Protective Partition and you cannot format the drive. Here is the fix to resolve the issue:
First, what is a GPT USB stick? The GUID Partition Table (GPT) is the successor to the Master Boot Record. The MBR was created by IBM back in the early 90s. The problem with MBR is the limitation to partition table sizes which is 2 Terabytes.
Since there are no 2T USB flash drives (at the time of this post), there is no need to use GPT as your partition table.
Removing the GPT Protected Partition can be accomplished through the Windows Diskpart program.
Determine the Disk Number for the USB GPT-protected drive. To do this, perform the following:
- Right-click on (My) Computer.
- Choose Manage.
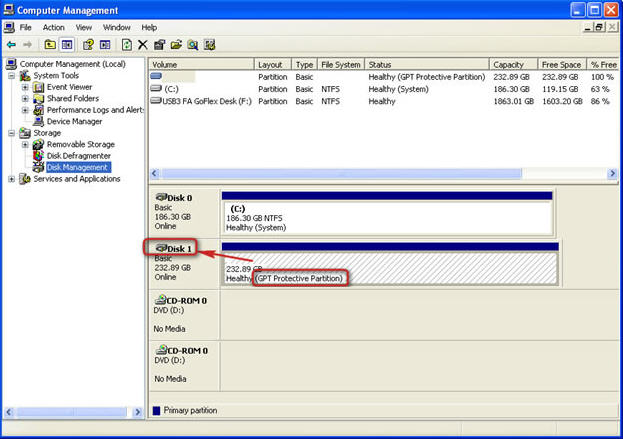
- Select Disk Management (listed under Storage).
- Look for the drive that is identified as GPT and note the Disk number (such as Disk 1).
- Now, open a Command Window. From the command prompt, type diskpart and press Enter.
The diskpart prompt will open. - From the diskpart prompt, type list disk and press Enter. A list of disks will appear in a text format. You will return to the diskpart prompt.
- From the diskpart prompt, type select disk disknumber (in this example from the screen shot above, you would type select disk 1) and press Enter. A message appears saying that the disk is selected. You will return to the diskpart prompt.
- From the diskpart prompt, type clean and press Enter. At this point the drive’s partition and signature a removed. You will return to the diskpart prompt.
- From the diskpart prompt, type exit and press Enter. Type exit once more to close the Command Window.
At this point, the internal and/or external drive can be re-initialized, partitioned and formatted.
- Launch Disk Management, and to initialize the disk:
- Use the Initialize and Convert Disk Wizard...
Or...
- Close the Wizard, right-click on the disk in question and select Initialize Disk from the drop-down menu.
- Once the drive is initialized, continue using Disk Management to partition and format the drive.
 |  |