To totally unlock this section you need to Log-in
Login
This guide explains how to import virtual machine images in the vendor neutral OVF and OVA format into VMware and Virtualbox. Virtualbox is totally a free tool. VMware comes in free version too (VMware Player and VMware ESXi) but it have certain limitations in its functionality.
In Virtualbox, when you create a new virtual machine, the default file format is .VDI. While there are options to use the VMDK (for VmWare), or VHD (for VirtualPC) format, there doesn’t seem to be a way to import in an existing VM of OVA format.
OVF, also known as Open Virtualization Format, is one of the way to standardize virtual appliance so they can be imported and use in different virtualization software. A virtual appliance in OVF format usually consist of a series of files. The OVA format is merely a single file distribution of the OVF, stored in the TAR format. In this tutorial, we will show you how to import and export an OVA file into/from Virtualbox.
Importing OVA file to Virtualbox
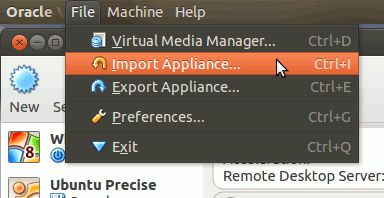
Assuming you already have your OVA file ready, in Virtualbox, you just have to go to “File -> Import Appliance” in the menu bar.
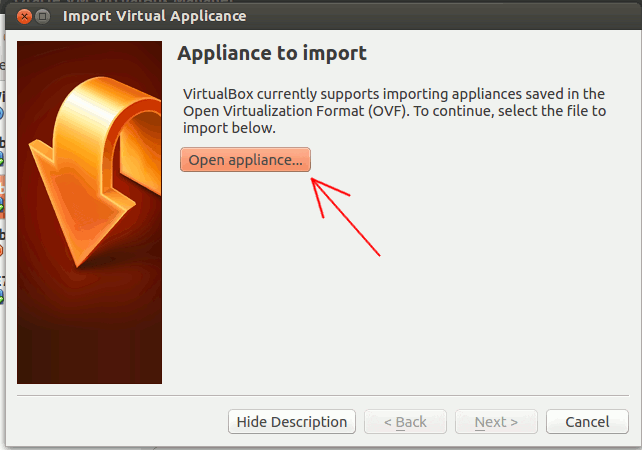
Click the “Open Appliance” button to select your OVA file. Once you have selected the file, click “Next”.
The next window will show you the configuration of the current virtual appliance. You can scroll through the configuration list and double click on any item (or check/uncheck the box) to make changes to it. Lastly, click “Import”.

Virtualbox will proceed to import the virtual machine into your library. Depending on the size of your OVA file, the import process could take quite a while.
Once the process is completed, you should be able to see the new VM in your list.
Exporting VDI to OVA file
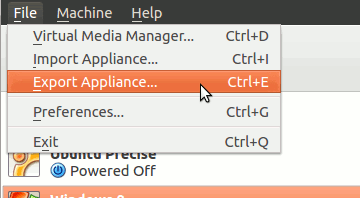
To export a VDI file (the default format for Virtualbox) to a OVA file so you can re-import in another virtual machine, you just have to go to “File -> Export Appliance” in the menu bar.
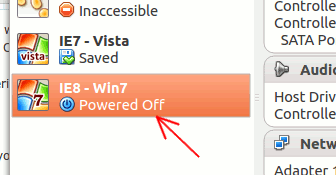
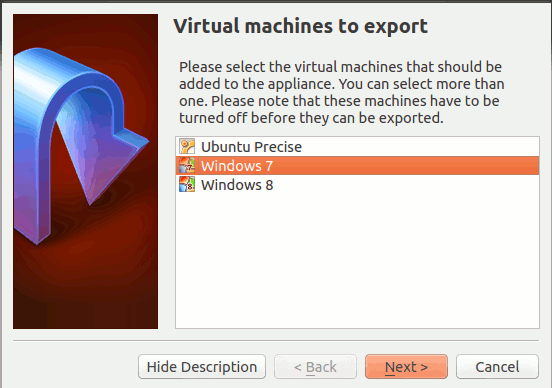
It will then prompt you to select the disk image that you want to export. In this case, we select the “Windows 7” image. Note that you can select multiple image at the same time.
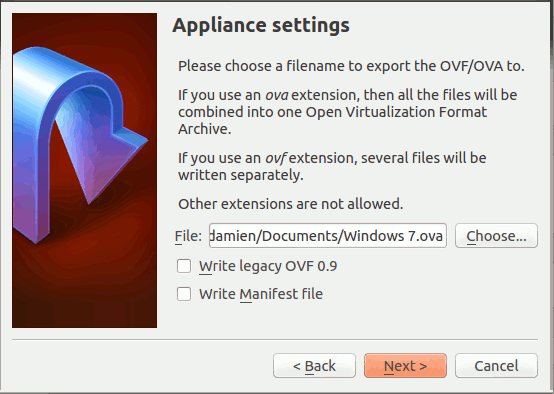
Next, select the path and filename where the OVA file will be exported. You will notice that Virtualbox will automatically append a .ova extension to the end of the appliance. You can, if you wish, change it to the .ovf extension. In this case, multiple files will be created instead of a single file.
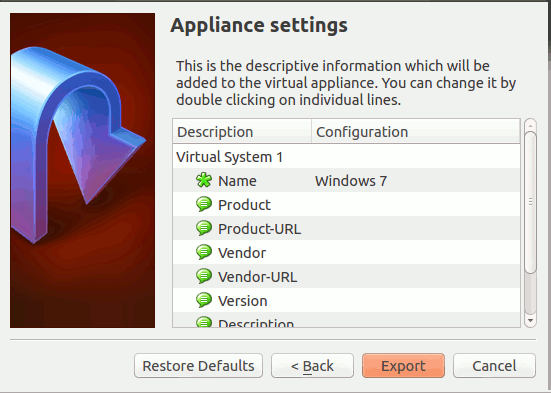
The next screen is the Appliance Settings page where you can review and edit the appliance configuration. In most cases, we will just leave this as the default.
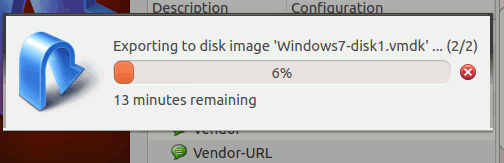
Lastly, click the “Export” button. Note that Virtualbox will first convert your image to vmdk format (the default in VMWare) first before packaging it in OVA format.
That’s it.
Export VM from VMware vCenter 5 in OVF
To start with we need power off the virtual machines that we are going to export.

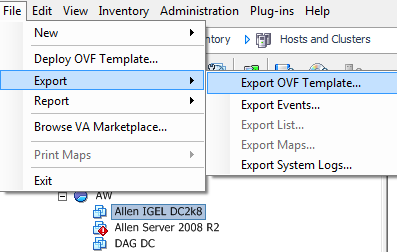
Once the virtual machine is powered off we are ready to export the virtual machine as an OVF. Highlight the virtual machine in question the select File > Export > Export OVF Template.
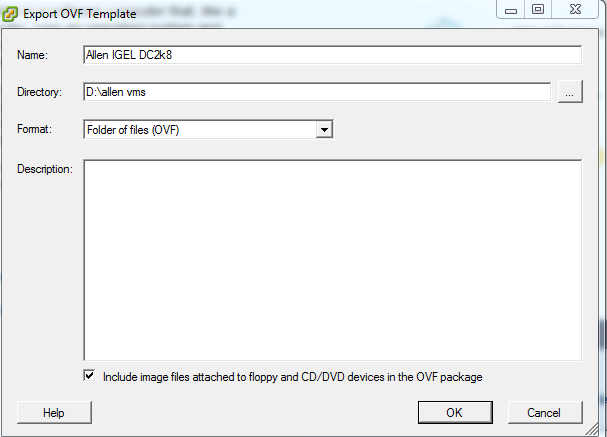
Then give the OVF a simple name, the directory on the system you would like to save it to and leave the OVF format as standard. Make sure you take the tick out of the option to also copy mounted media with the OVF.
The process will start. Be aware this may take a LONG time depending on the size of your VMDK`s. Have a coffee.
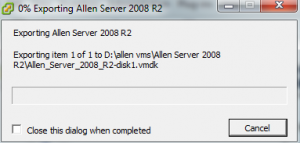
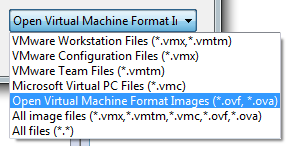
Once finished you will see the message stating the the export has been successful. Now, we nee to launch VMware Workstation (8 in my case ). Then select File > Open.
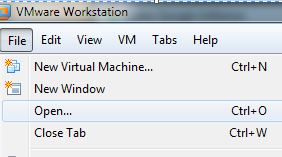
In the open screen, change the open format to OVF and then select your OVF and import it.
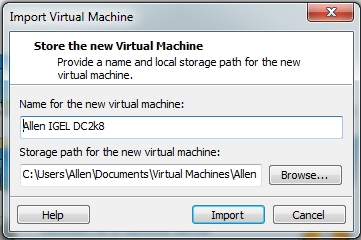
The system will now go away and import the OVF file into workstation 8.Again, be aware this will take a fair amount of time depending on the size of the OVF. Then you will be able to power the machine on with no problems.
 |  |