To totally unlock this section you need to Log-in
Login
File History is an awesome tool included in all versions of Windows 8 and Windows 8.1. It allows for easy automated backups of your data and it works with a number of devices on which data can be stored.
As you will see from this guide, it is very easy to setup and use, it needs few system resources and it knows how to store multiple versions of your files so that you can easily revert the version you need, when you need it. In this first guide about File History in which you will learn how to find it, enable it and change the way it works.
How to Access File History in Windows 8 & Windows 8.1
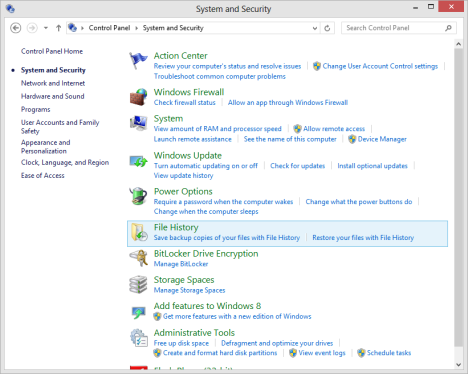
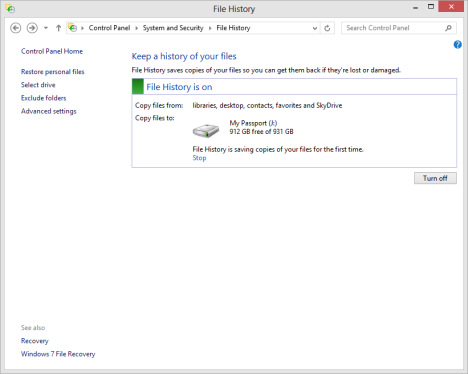
File History can be found in the Control Panel. Open it and go to System and Security. There you will find File History. Click or tap on it to open the tool.
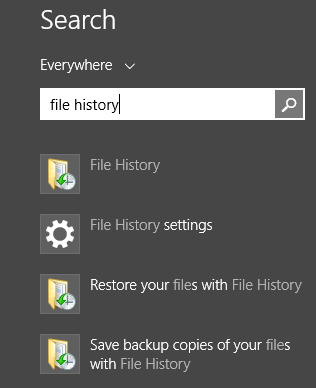
Alternatively, you can search for the words "file history" directly on the Start screen. Filter for Settings and click or tap File History.

In Windows 8.1 you no longer need to do any filtering when performing the same search. The File History shortcut is displayed immediately.
In Windows 8.1 there's also a touch-based interface available for File History This will be covered in a separate tutorial. For this guide, we will stick to the desktop version.
How to Turn On File History
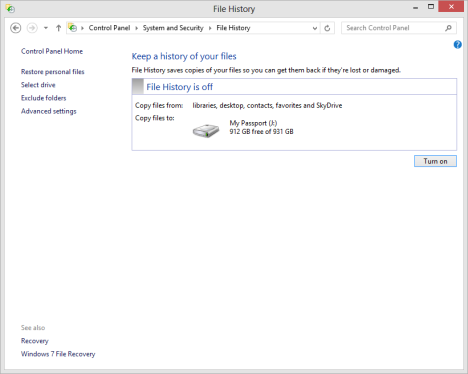
Turning on File History is very easy. Plug in an external hard drive or a large USB memory stick with plenty of space on it. Then, simply click or tap the Turn on button.
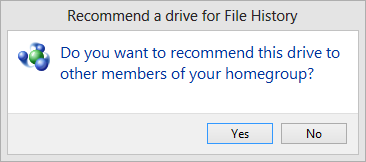
You are asked whether you would like to recommend the drive to other members of the homegroup.
Make a choice and File History starts its job immediately.
What Does File History Backup?
File History has a predefined set of items that it backs up automatically: all your libraries (both default libraries and custom libraries you created), the Desktop, your Contacts, Internet Explorer favorites and the SkyDrive.
You cannot set it to backup specific folders or libraries. You can only set it to exclude items from your backup, using the procedure detailed in the next section of this tutorial.
If you want it to backup a special folder, you should create a new library for it or include it in an existing library.
How to Exclude Libraries and Folders from the Backup
To exclude specific libraries and folders, click or tap Exclude folders in left-side column, found in the File History window.
Then, press Add and select the item(s) you want to exclude.
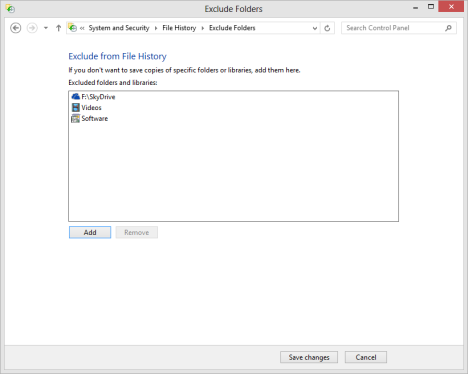
When you are done setting exclusions, click or tap Save changes.
Backup Other Folders
If you have a folder that is not included by default, you can either add the folder to an existing library or creating a new library and then adding it to the new library. Remember that a library is just a logical group or container that holds pointers to the locations where the files are actually stored. See more info on what is a library below.
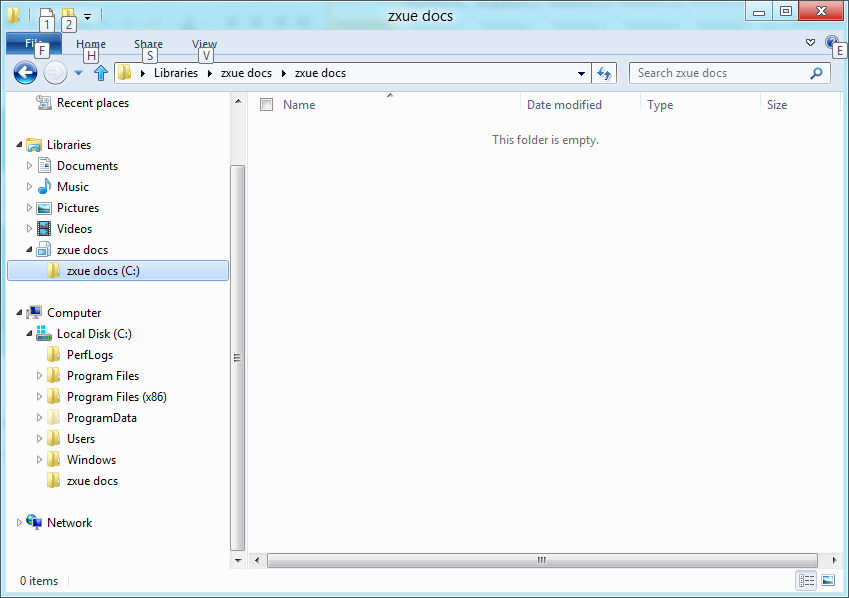
Libraries are collections where you can get to all your documents, music, pictures, and other files in one single place. In some ways, a library works just like a folder: you can use it to browse and sort files. But unlike a folder, a library gathers files that are stored in several locations. This is a subtle, but important, difference.
Libraries don't actually store your items. They pull from folders that contain your items, and let you access and arrange the items in different ways. For example, if you have music files in folders on your hard drive and on an external drive, you can access all of your music files from the Music library.
You can select a folder and include it to an existing library. Select a folder, for example, zxue, right click on it and move the mouse cursor to Include in library. Choose a library from the list.
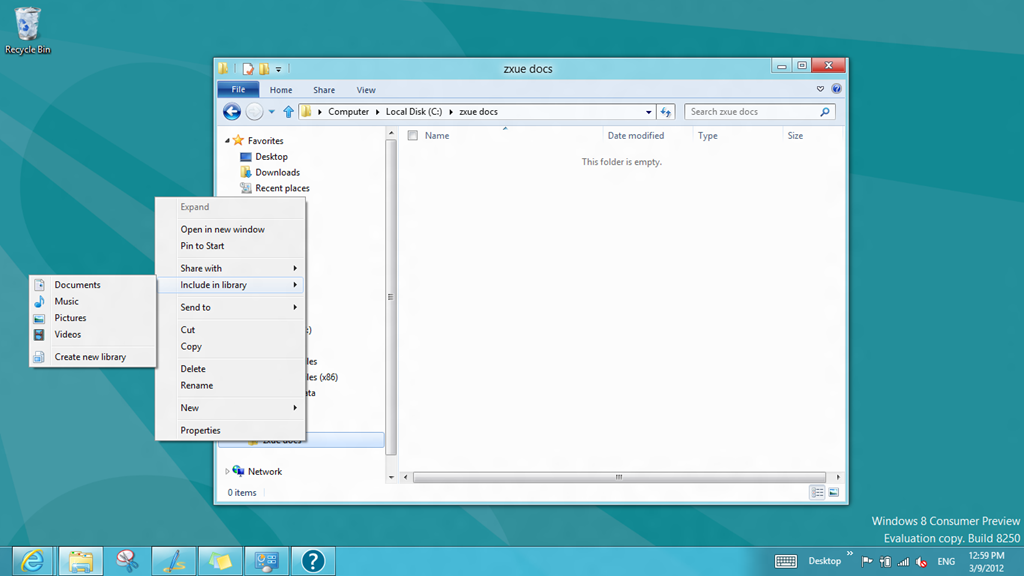
You can create a new library by clicking on “Create new library”. The select folder is automatically added to the new library.
How to Configure How File History Works
You might not be happy with the defaults used by File History, so you should consider improving them. On the left-side column, click or tap Advanced Settings.
In the Advanced Settings window, you can set how often copies are made. The default is Every hour. You might want to change this to Every 15 minutes or Every 30 minutes.
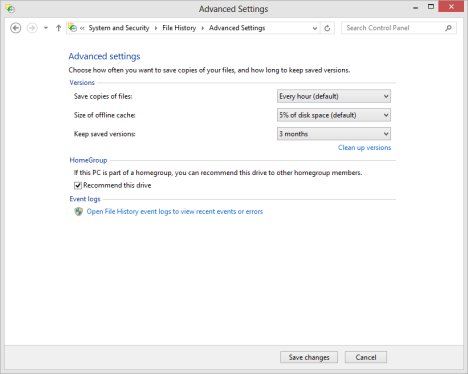
If you want to, you can also change how much of your disk space is used by the offline cache created by the tool. One of the most important settings is how long you want to keep saved versions for each file. The default is Forever. We prefer a shorter time frame so we selected 3 months. You might want to do the same.
Just in case you are not familiar with "saved versions", they are the different versions of a file. For example, you can work on a document and end up having 10 different versions of it. By default File History keeps all of them, forever. :) Now you see why you might want to limit for how long they are stored.
You can also change the backup drive used by File History, in case you need this. Click or tap Select drive in the left-side column, in the File History window. Then, select the appropriate drive from the list.
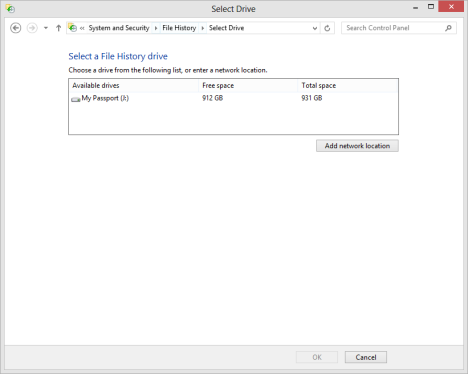
You can also add a network location, such as a drive recommended for use through the Homegroup.
What Happens When You Disconnect the Backup Drive?
One of the coolest things about File History is that it works silently in the background, without eating too much CPU time and without stressing your hard disks.
Yes, it takes awhile for it to backup the data, especially the first time you do it, but it works without user input. And that's great.
Also, when you unplug the backup drive, File History stops working and it shows a discreet warning: "We can't finish copying your files. Connect your File History drive and refresh this page to continue".
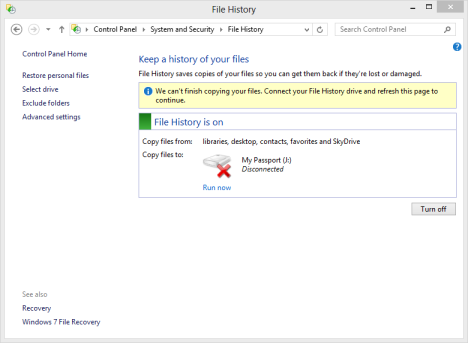
When you plug the drive back, File History resumes backing up your data, silently.
 |  |