 --> (Word) --> (Word) |  --> (PDF) --> (PDF) |  --> (Epub) --> (Epub) |  --> (Text) --> (Text) |
 --> (XML) --> (XML) |  --> (OpenOffice) --> (OpenOffice) |  --> (XPS) --> (XPS) | |
The first step in customizing your SharePoint site is to create a custom master page. The following steps will help you do just that (please note there are differences indicated between SP 2007 and SP 2010).
- Open SharePoint Designer (SPD) and connect to the root level of your site's site collection.
- In SPD, open the "_catalogs" folder, then open the "masterpage" folder.
- Identify the out-of-the-box (OOTB) most like your ultimate design.
- (SP 2007) If your SharePoint's site design is to be fixed-width and centered on the page, select BlueBand.master and copy it.
- (SP 2007) If your SharePoint's site design is to be a liquid layout that fills the page regardless of the user's screen resolution, select default.master and copy it.
- (SP 2010 beta) You want v4.master.
- In SPD, right-click on the master page you want to duplicate and select "Copy", then paste it back into the same folder.
- Rename the new file something project-specific. For instance, if this master page is to be used on the sales portal, you might rename the new master page SalesPortal.master.
- Publish and approve the new master page.
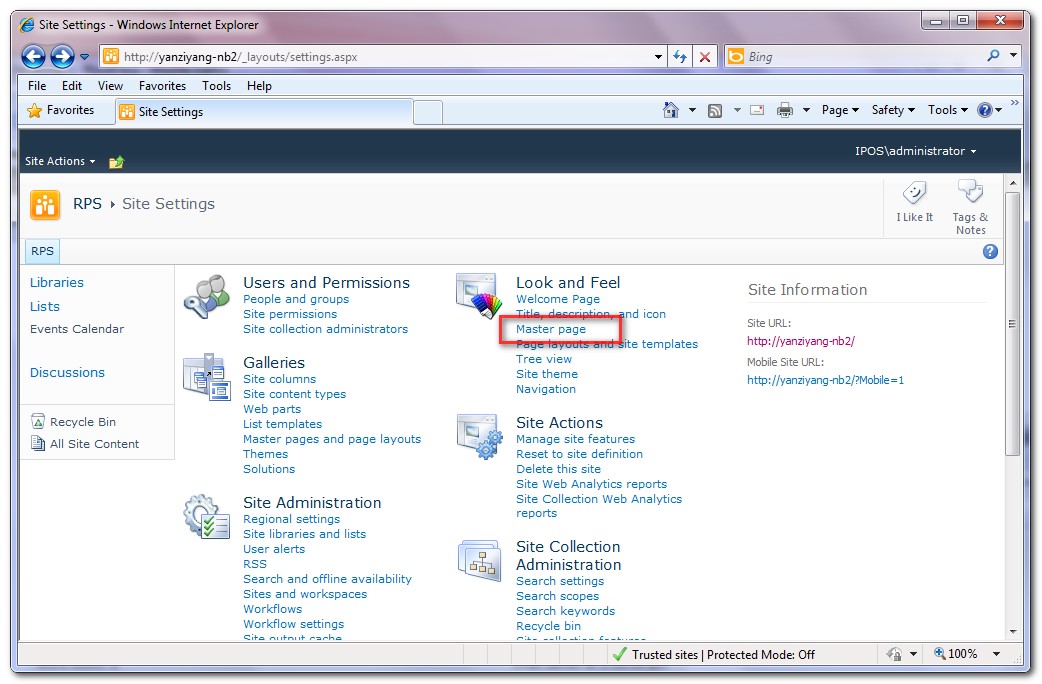
- In your [gs browser], navigate to your site's Site Settings page. Under the "Look-and-Feel" column click "Master page" .
- Select your new master page as the site master page (the need to set the system master page will vary by project). Save the settings change.

Your site is now using the new master page you created. From here you modify the master page to your liking, including adding custom CSS and custom JavaScript and jQuery.
SOURCE | LINK (fitandfinish.ironworks.com) | LANGUAGE | ENGLISH |

