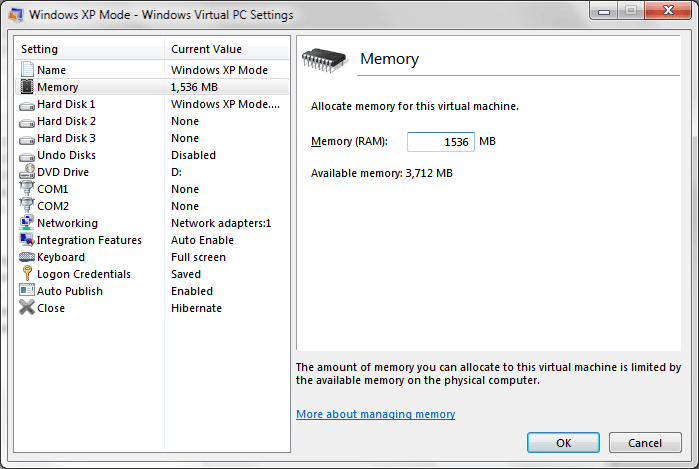
I recently installed Windows Virtual PC on my Windows 7 laptop and so far really like using it for virtual machines. One thing that I needed to change after the initial installation was to assign more available memory to the virtual machine which I initially thought I could do from within the XP Mode virtual machine as displayed in the below image.
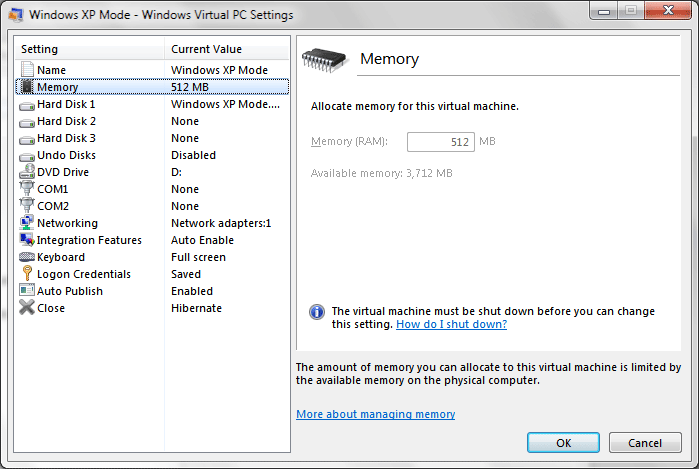
The above XP Mode Settings configuration window was opened from the Windows Virtual PC toolbar that displays at the top of a VM window. On this toolbar click on Tools and select Settings from the drop down menu to launch the Virtual Machine Settings as displayed above.
After the initial screen is launched click on Memory in the left hand navigation to display details about the amount of memory available to the Windows Virtual PC Virtual Machine which in this case is Windows XP Mode. As you can see from the Settings configuration window you cannot modify the memory allocated to this VM from within the VM itself.
To modify the amount of memory allocated to the virtual machine follow the below directions.
[tab:Step 1]
Modify The Amount Of Memory Allocated To A Windows Virtual PC Virtual Machine:
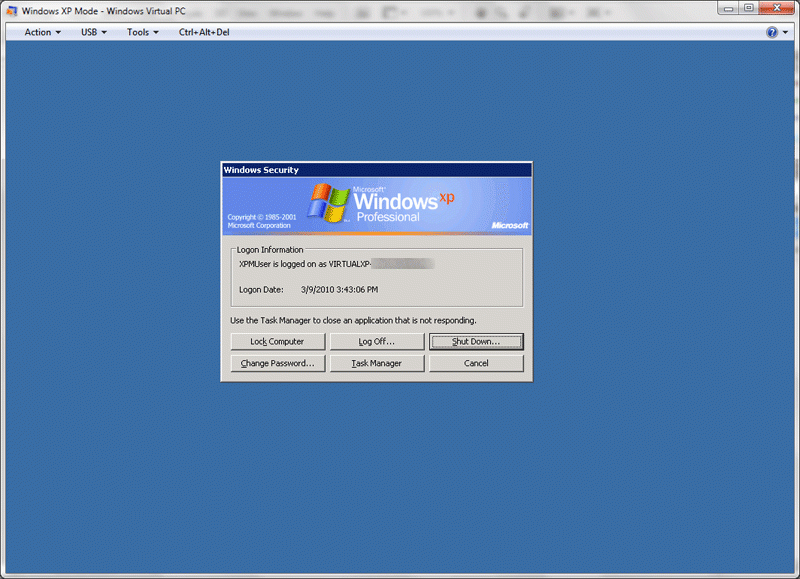
- Shutdown Virtual Machine: If you have not already done so make sure to shutdown the Windows Virtual PC Virtual Machine. Click on the “Ctrl+Alt+Del” option from the Windows Virtual PC Virtual Machine toolbar which will launch the Windows XP logon window from which the computer can be shutdown as displayed in the below example image.
From the above Windows logon window you can click the Shutdown button which will open a new configuration window from which you can either Restart, Log Off, or Shutdown. Make sure to select Shutdown and then click OK to shut the XP Mode Virtual Machine completely down.
[tab:Step 2]
Verify Virtual PC VM Shutdown: Now click the Windows icon in the lower left corner of your desktop to launch the Windows Start Menu and click the All Programs selection to display all of the Programs available on your Windows 7 computer.
Scroll down the list until you can click on Windows Virtual PC which will display numerous options of which you will want to click on the sub item called Windows Virtual PC.
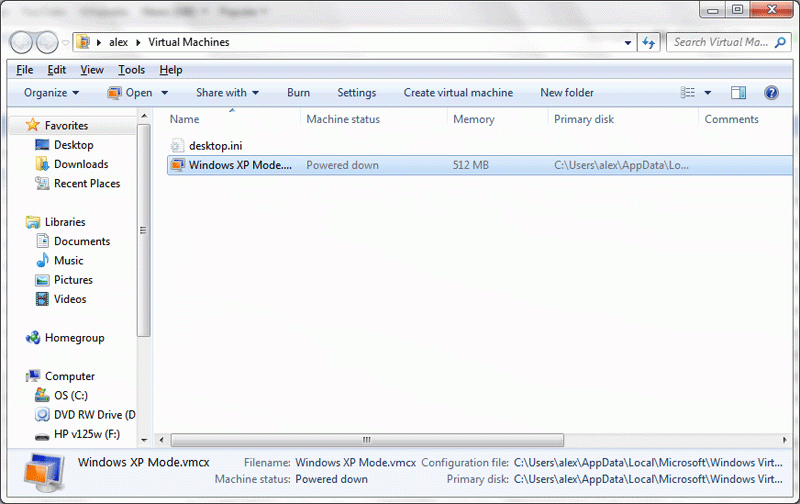
This will launch the Windows Virtual PC Virtual Machines management window as displayed in the below image.
Make sure that the Virtual Machine that you want to assign more memory to has a Machine Status of “Powered Down”.
[tab:Step 3]
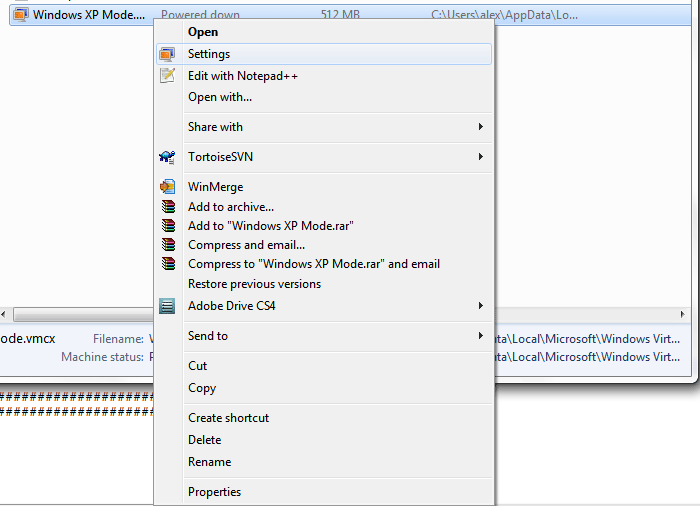
Open Virtual Machine Settings: Now right click on the VM you want to assign more memory to and select Settings from the configuration menu that appears as displayed in the below image.
[tab:Step 4]
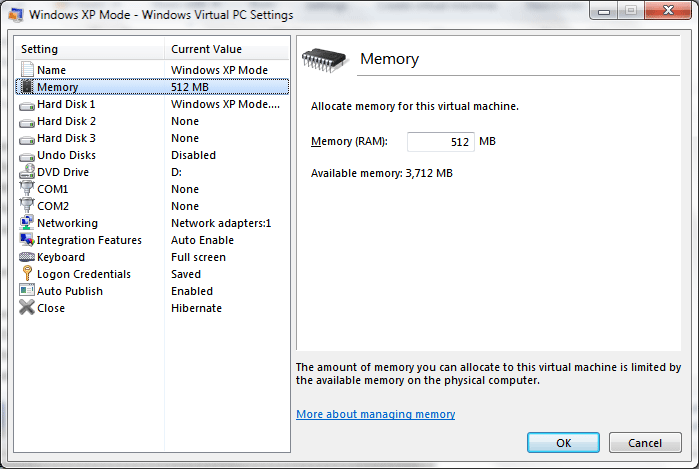
Open VM Memory Configuration: After clicking on Settings in the above configuration menu the VM Settings configuration window will appear. Click on Memory in the left navigation to display the VM Memory Configuration window as displayed below.
[tab:Step 5]
Modify VM Memory Allocation: Now simply modify the number in the field in the right pane of the VM Memory configuration window. For instance by default Windows Virtual PC provided 512MB of memory to the XP Mode Virtual Machine and I wanted to modify that to 1.5GB or 1536MB of memory available to the XP Mode VM.
I simply changed 512MB to 1536MB as displayed in the below image and then clicked OK button to save the setting.
[tab:Step 6]
Launch XP Mode Virtual Machine: Now double click on the XP Mode Virtual Machine from the Windows Virtual PC Virtual Machine management window displayed in step 2.
Doing so will begin the XP Mode Virtual Machine launch process by displaying the below.
Your XP Mode VM will now have the amount of memory you provided available to it. You can modify this setting at any time and the concept should be exactly the same for a VM running any OS.
I believe that XP Mode is limited to 3.7GB because of limitations within Windows XP but it may also be a limitation of Windows Virtual PC.
[tab:END]
SOURCE | LINK | LANGUAGE | ENGLISH |

